Dehydrated Foods Aren’t Just for Trail Mix Anymore!

Dehydrated foods can be used in a plethora of creative ways, like savoring the flavors of seasonal fruits and vegetables. Seasonal fruits and vegetables are cheapest when they are in season, so dehydrating seasonal items will save you money year round. There are also health benefits to dehydrating raw foods by removing the water in food through dehydration the beneficial enzymes remain alive, which preserves all the nutrients. Dehydrating foods is a simple process that can easily be done in your home with a dehydrator.
Tip: The Cabela's Six-Tray Heavy-Duty Dehydrator has a powerful, rear-mounted, 800-watt heater. The fan forced hot air blows horizontally across each individual tray towards the core to ensure even, consistent drying.
Here’s How to Dehydrate Foods
1. A very important step in dehydration is to start with the best quality possible of fruits and vegetables. Overripe and bruised produce will not yield good results when dehydrated.
2. Clean, hull and slice all fruits and vegetables, taking care that they are all sliced the same thickness, this ensures everything dries at an even rate.
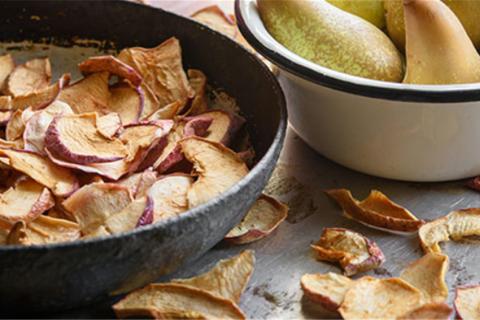
3. For oxidation prone foods, such as apples or pears, it’s best to brush citrus juice or ascorbic acid over them prior to dehydration. This will maintain the color of the fruit through the dehydration process.
4. If you are dehydrating vegetables such as potatoes, cauliflower, celery, broccoli, corns and peas it’s preferred to blanche them before dehydrating them. Bring a pot of water to a boil and blanch them for three to five minutes. Finish by placing them in ice water to stop the cooking process, and then dry on paper towels.
5. Season! Yes you can season your dehydrated foods. If you want to add salt, sugar or spices now is the time!
6. Place the slices of produce onto the dehydrator trays. Be mindful not to overlap the pieces, this won’t allow them to dehydrate evenly.
7. Then turn your dehydrator on immediately after loading the trays. Please review your dehydrators manual for correct cooking temperatures and times.
8. As you reach the end of the dehydration process draws near, be sure to check your produce for dryness. To do so, take a piece off the tray and allow it to dry. If it feels dry and crispy like to your fingers, then they are done. If moisture beads are at all present your produce is not dry enough and needs more time.
9. Once your produce is done and fully dry, allow them to cool for at least 60 minutes or until completely cool to the touch. Any residual heat can cause condensation when they get stored and will ruin your food.
10. To store your produce I highly recommend storing them in sterilized airtight Mason Jars with a desiccant pack placed inside the jar as well. Be sure to store your jars in a cool, dry and dark place.
After you have dehydrated your food, the fun part begins! Place your produce in Ziploc Baggies for a snack. Dehydrated fruits and vegetables make great travel snacks. Want to fancy up your next cocktail? Simply add one cup of sugar and ¼ cup of dehydrated fruit of your choice in a food processor, pulse together a couple of times, then use the infused sugar to grace the rim of your glass. Go one step further and use that sugar mixture in your next baked good. Craving blueberry muffins when blueberries aren’t in season? Simple! Replace the fresh blueberries with dehydrated blueberries by at least half the amount of fresh. Dehydrated apple slices also make great chips for a caramel cream cheese dip. Forgot the veggies for your spaghetti sauce? No problem! Simply rehydrate your vegetables in hot water and use them just as you would fresh vegetables.
- 5178 views