 All of us want to take the best pictures of our fishing to achieve those lasting memories and give our friends and families some real enjoyment. Here are some of the starting basics to consider.
There are two types of cameras you can use:
- DSLR or digital single lens reflex cameras are the first type. This camera permits the photographer to view through the lens and see exactly what will be captured. After setting your controls, you focus and shoot the image immediately. It has the most abilities, features and potential for almost limitless results for your fishing images. It also takes a fair amount of study, practice and mastery because of all those features. If you purchase a DSLR camera, consider also buying, renting or using a polarizing filter to make the sky and clouds "pop" and also a fisheye lens to expand and contour a "flat" small scenic or technical picture.
- Point and Shoot cameras are the second type. These cameras make it the easier on the photographer with in-camera automatic image focus and recognition. The point and shoot does a lot of the "work" for you. You press the shutter button halfway to focus and then snap your image. Point and shoot cameras have an evolving technology that features some astonishing in-camera editing and they are beginning to rival what you can achieve with a DSLR camera.
For the post-production editing of your images on your computer, start with a rudimentary free image management system like Picasa and graduate up to Photoshop.
Here are the basics of taking a pleasing picture:
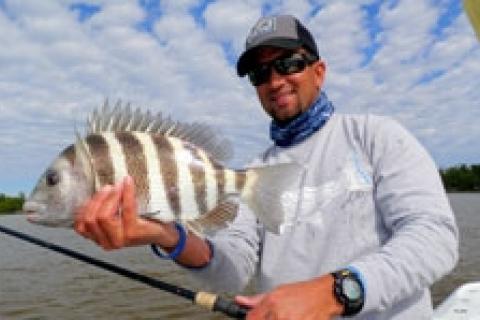
- Be sure the fish is alive, is moist and has its colors.
- Have the angler smile and look at the fish, not you.
- Make your shot seem less posed by adding another angler in the image and have both people admiring the catch by looking at it.
- Plan on having your image tell a story or create a pleasing emotion.
- Take as many shots as you can of any action or hero shot, since there will be one best shot that you will see and edit in your computer
- The knowledge that you are no longer wasting film should encourage you to take at least 10 images of one particular shot.
- Think about including the lure (in the fish's mouth) and your light tackle as well in the picture.
- Focus on the eye of the fish.
- If using a DSLR camera and you want good clarity of angler AND fish, minimize background defocus.
- Try to have the subject wear a blue or red shirt for more life in the image.
- Avoid using a gripping device in the mouth of the fish — instead, cradle the fish. Refer to Flats Fishing Online for examples of proper cradling of a fish and other features.
- Try to put your subject away from dead center of the image for a more dynamic effect.
- Always think of how you want the picture to be composed before you shoot it.
- Also think of posing your fish slightly above the water if you can achieve this.
- If your angler is wading, do not hesitate to pose them in the water with the fish for a natural look.
- When composing your shots, divide your subject matter within three imaginary vertical and three horizontal lines — this will give you a better frame of reference.
- Be aware that lighting is the lifeblood of images. Always be conscious of your lighting and shoot for the delicacy you get during those magic dawn and dusk low light times
- If you shooting in the middle of the day and the subject has a ball cap shadow, use a flash to eradicate that shadow.
- 3084 views