 |
| Foil is one of the key components of campfire cooking. |
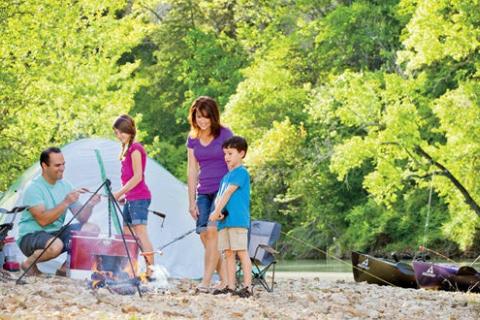
Food tastes delicious when cooked outdoors. And nothing quite highlights a fun campout like favored foods prepared over an open fire.
Modern camp cooking can be much like cooking at home: Push a button to light the camp stove or gas grill or start a charcoal fire, and you're ready to prepare a hot, delicious meal. For many of us, however, camp cooking means campfire cooking. We enjoy preparing foods the old-fashioned way: over the glowing coals of an outdoor fire.
Here are some campfire cooking tips to help you whip up mouth-watering meals for hungry campers and make your next excursion especially memorable.
Preparing the Campfire
In many areas, campfires are allowed in designated areas only. If conditions are dry or otherwise unfavorable, fires may be prohibited. Heed warnings, and if it's windy or dry, don't build a fire.
If a fire ring is available, use it. Otherwise, make your fire a safe distance upwind away from grass, shrubs, trees and tents. Remove ground litter, twigs and leaves down to bare soil in an area at least 10 feet around the campfire. Encircle the fire site with rocks if no other barrier is present.
Hardwoods, such as oak, hickory, apple and mesquite, are better than soft woods like pine and cedar for creating a bed of coals over which to grill foods, cook foil packets or cook on a spit. Soft woods are excellent, however, for baking with a reflector oven, which cooks by radiant heat.
Make your fire just large enough to meet your needs, and don't leave it unattended. If you must leave, extinguish the fire by killing all embers and dousing all sticks with water. Stir and douse again.
Cooking On a Stick
 Cooking on a stick is one of the simplest campfire cooking methods. All you need really need is a long, straight, green tree limb and some food like hot dogs, marshmallows or small pieces of fruit, vegetables or meat. You also can use utensils like Rome Campfire Hot Dog Fork or Marshmallow Tree. Let everyone do their own cooking while you prepare side items like buns, condiments and veggies. In minutes, supper is ready.
Spit cooking is similar, but food on the stick is suspended over cooking coals by supports under both ends. The supports can be forked sticks driven in the ground at an appropriate height, or something more elaborate like custom-made iron posts with hangers so the spit can be moved up and down above the coals for the best cooking temperature. Items like the Rotisserie Grill and Spit work great as well.
Basting adds flavor to spit-cooked entrees and gives a nice glaze. You can use drippings from meat or other fat alone or mixed with wine. Or you can prepare your own special basting sauce, as I've done in this recipe.
![]() Click here to see a larger view of the Venison Luau camp recipe.
Click here to see a larger view of the Venison Luau camp recipe.
1. Venison Luau Camp Recipe
Venison Luau |
Roll the steak up like a jelly roll and tie with cotton cord. Lay strips of bacon over the rolled roast, covering all sides; wrap tightly in aluminum foil and place on a spit. Turn over a medium-hot fire 45 minutes to 1 hour. During the last 15 minutes of cooking time, remove the foil and baste with a mixture of pineapple juice, brown sugar and mustard. |
On the Grill
Some camp chefs are skilled enough to balance a skillet or pot on rocks or logs, but most of us find it safer to cook on a grill. Cast-iron cookware works best, like the quality products made by Lodge. A variety of good grills are available, from the compact, foldable Camp Grill (available in several sizes) to Camp Chef's highly versatile Mountain Man Grill. Also available are tripods like the Tripod Campfire Grill and Lodge's Tall Boy Camp Dutch Oven Tripod that allow you to hang a grill or Dutch oven at just the right height over cooking coals.
You can, of course, cook right on the grill, and nothing's better prepared this way than marinated steaks.
![]() Click here to see a larger view of the Marinated Camp Steak recipie.
Click here to see a larger view of the Marinated Camp Steak recipie.
2. Marinated Camp Steak Recipe
Hot-off-the-Grill Camp Steaks |
Mix all ingredients and pour over steaks in a zip-seal freezer bag. Seal the bag and place in a cooler at least 2 hours. Remove meat from marinade and cook to desired degree of doneness on the grill. |
Foil Cookery
Heavy-duty aluminum foil can be used to wrap fish and other food items that can be cooked directly in campfire coals. A double wrap makes clean up a breeze.
Foil cooking is a great way to cook right on hot coals, or on a grill, and let everyone choose the ingredients they like for lunch or dinner. Start by placing 18-inch-long rectangles of heavy-duty aluminum foil on a table. Then place a variety of meats, vegetables and fruits, each cut in bite-sized pieces, in individual bowls. These might include such items as hamburger, chicken, cubed steak, sausages, tomatoes, potatoes, onions, pineapple, green peppers and more. Use whatever your diners might enjoy. Put seasonings on the table, too.
Now, allow each person to get a piece of foil and the foods he or she likes. Lay the foil flat, place the food on top, season to taste and fold the foil in half so the food is between the folded pieces, near the fold. Then, beginning at the place where the two end edges meet, make a fold of about 1/2 inch and firmly press this, sealing the seam. Then fold the seam over two more times, half inch at a time, and press to seal. The two open ends are then sealed in the same manner.
Add another foil wrap around this one to seal out ashes, and the packet is ready. Cook in coals about 12 minutes per side or until done. Open carefully so steam inside the packet doesn't burn you. When you remove the outer wrap, the inside package will still be clean, and the opened foil can be used as a plate or serving dish. Eat and enjoy! Here's a great fish recipe that also lends itself well to foil cookery. It's delicious!
![]() Click here to see a larger view of the Foiled Again Camp Cooking Fish recipie.
Click here to see a larger view of the Foiled Again Camp Cooking Fish recipie.
3. Foiled Again Fish Fillet Camp Cooking Recipe
Foiled Again Fish Fillets |
Combine cracker meal, parsley and dill; set aside. Melt butter in a skillet and saute garlic 1 to 2 minutes; stir in lemon juice. Brush fish with this mixture and place on a sheet of heavy-duty aluminum foil, shiny side inside. Toss remaining lemon-garlic-butter with cracker meal mix; spoon over fish. Seal foil packet and cook over coals 8 to 10 minutes, turning once, or until fish flakes easily with a fork. |
Reflector Ovens
Reflector ovens are wonderful gizmos for campfire cookery. They are simple to use, take up little space and do a professional job of baking biscuits, pies, cakes, cookies, pizza, casseroles and other foods. Complete ovens sell for $60-$100 online, where you also can find plans for making ovens of different shapes and sizes.
The principle by which reflector ovens work is simple: Heat from a high, flaming fire (not coals) is reflected from the oven's shiny interior. The reflector's slanting top and bottom direct the heat toward the top and bottom of the pan of food being baked, allowing it to brown evenly on upper and lower surfaces. If the cooking temperature seems too hot or too cold, move the oven backward or forward to adjust it. If the food cooks unevenly on the sides, rotate the pan.
Place the oven and fire on flat, level ground. Then, gather an ample supply of firewood — sticks 1 to 2 inches in diameter are best; larger wood should be split. Softwoods like pine burn hot and fast, ideal for reflector-oven cooking.
Place food on a pan or piece of foil that fits the reflector oven shelf, and position the oven near the fire. Learning just where to place the oven so it heats to the right temperature is the key to good cooking. An oven thermometer on the food shelf helps.
After five minutes, check the food to be sure it's cooking properly. If the top is browning faster than the bottom, the fire is too large. If foods are browner on bottom than on top, the fire is too small. Make adjustments as necessary.
Carry two thick potholders or heavy gloves for moving the oven and handling the food. Most reflector ovens also have a back flap that can be opened to check the food.
Now that you know how to cook, all you need is a recipe to try. Here's one of my favorites:
![]() Click here to see a larger view of the Cheese-Garlic Buscuit Camp Cooking recipie.
Click here to see a larger view of the Cheese-Garlic Buscuit Camp Cooking recipie.
4. Cheese-Garlic Biscuits Camp Recipe
Cheese-Garlic Biscuits |
Mix Bisquick, milk and cheese until a soft dough forms. Beat vigorously 30 seconds. Drop dough by spoonfuls onto a sheet of lightly greased aluminum foil cut to fit the shelf of your reflector oven. |
- 17223 views