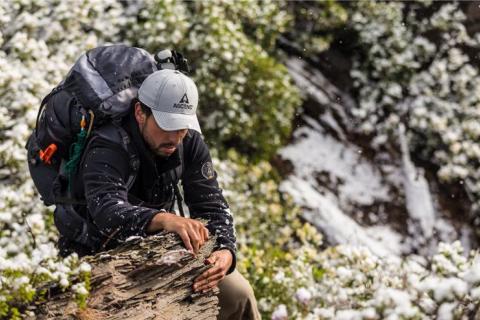
Hikers love nature and getting outdoors away from the busy lives they lead. Communing with nature however does have its challenges, especially in winter for the beginning hiker. Learning how to keep your equipment in good shape can lessen the worry of being unprepared for winter weather hiking and the snow covered ground. Here's how to stay outside all winter long.
![]() Quick Link: In this article we'll talk about how to keep your hiking boots it tip top shape for year long hiking plus six expert tips for winter hiking safety.
Quick Link: In this article we'll talk about how to keep your hiking boots it tip top shape for year long hiking plus six expert tips for winter hiking safety.
There’s no doubt that hiking boots are the most important piece of gear a hiker will ever own. Your boots are literally the only point of contact between you and the ground you’re walking on, so they better be comfortable. A good pair of hiking boots like the Ascend Ultra Approach Hiker can make or break your outdoor excursions, and sure, they’re meant to get plenty dirty, but that doesn’t mean you have to walk around in boots caked with leftover muddy snow every time you hit the trail.
There’s no better time than now to start taking these simple extra steps to make sure your boots stay in great condition throughout the winter. Get the most out of your boots, your adventures, and your body by setting yourself up for success with high quality boot care.
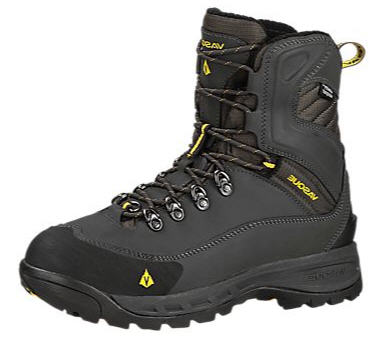 |
| Top rated Vasque Snowburban UltraDry Insulated |
1. Buy High-Quality Boots in the Right Size
There are a few things you shouldn't go cheap on, and one is your hiking boots. Buying the right size boot is key to your happiness on the trail. Buy boots too small and you’ll blow out the seams on the sides near the toe. Buy boots too big and you’ll get annoying creases around the toe and give you some of the worst blisters you’ve ever experienced.
As for high quality, it may seem like a no-brainer but just hear us out. In most cases you get what you pay for when it comes to hiking boots. Not everyone is willing to drop the extra dollars on a higher quality pair of boots. But think of it this way, you can buy a cheaper, decent pair of boots that will cause you all kinds of agony on the trail and probably end up going through a few more pairs when they don’t last, or there’s the other option. You can simply spend the few extra dollars on a higher quality boot now and save yourself all the trouble later. We choose the latter.
![]() Quick Links: Hiking Boots on BassPro.com: Hiking Boots for Men, Hiking Boots for Ladies, Hiking Boots for Kids
Quick Links: Hiking Boots on BassPro.com: Hiking Boots for Men, Hiking Boots for Ladies, Hiking Boots for Kids
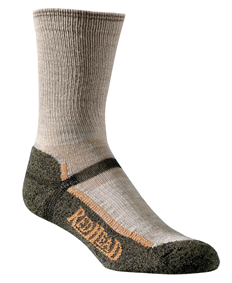 |
| RedHead Merino Hiking Socks RedHead Merino Hiking Socks |
2. Wear Good Socks
This is often one of the most overlooked parts of hiking, but it’s actually quite simple. If you want your boots to last longer, wear high-quality hiking socks. Socks play a couple of important roles in the process. First, they will prevent moisture from getting into the insole, which is particularly important if you have waterproof boots. Secondly, socks will prevent your insoles from any unnecessary wear and tear by serving as a barrier between your friction-causing foot and the boot itself. Plus, good socks will make your feet feel loads comfier after a long hike. It’s really a no-brainer.
![]() Tip: Try the famous Lifetime Sock at Bass Pro Shops that comes with a lifetime guarantee.
Tip: Try the famous Lifetime Sock at Bass Pro Shops that comes with a lifetime guarantee.
3. Wear Boots for Hiking Only
Okay, so this one can be tricky. You should really only wear your hiking boots while you are actually hiking. If you wear your boots while on the daily grind, exposing them to pavement and day-to-day wear and tear, you’re decreasing the lifespan of your boots. This one is also pretty simple. The more you wear any shoe, the quicker it will wear out on you.
But you say, “My hiking boots are tough! They can handle it!” Yes, hiking boots are designed with more flexible lugs and outsoles, providing more traction on slippery terrain than other shoes, but they can wear out fairly fast on pavement.
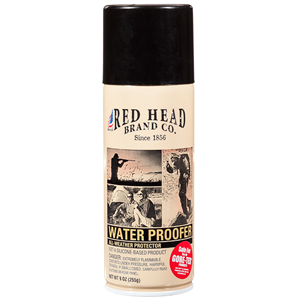 |
| RedHead Waterproof Spray for Shoes and Boots |
4. Waterproof Your Boots
This is definitely another key step in lengthening the lifespan of your boots. You can prevent the leather from becoming waterlogged by simply waterproofing them. Not that surprising right? Most hiking boots will come pre-waterproofed, but the treatment can wear off after a few months of use. So do a test to see whether or not your hiking boots can repel water. But always remember to never treat your boots without cleaning them as thoroughly as possible first.
Simply drip some water on the leather surface. If it beads up and rolls off, your boots are waterproofed. If it doesn’t, then it’s probably the right time for you to invest in a waterproofing treatment like the multipurpose Kiwi Water Repellent or RedHead Waterproof Spray for shoes and boots. When used properly, a waterproofing treatment will ensure your boots don’t become over saturated with water. After spraying, typically allow two to three hours dry time and reapply as needed.
5. Moisturize the Boot Leather
It’s not easy ensuring leather hiking boots always have the right amount of moisture. If they’re over saturated with water, the shape of your boots will probably warp when drying. On the other hand, if the boot doesn’t have enough moisture, the leather can dry and crack. Neither is a good option.
In order to keep your boots moisturized, try using a leather conditioner. There are a variety of leather conditioners available in sprays, oils, and creams. Remember to make sure your boots are clean and dry before applying the conditioner. Working the conditioner into the leather, seams, and joint at the sole of the boot with a soft rag should do the trick.
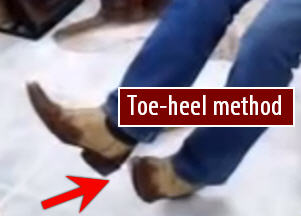 |
| The wrong way to remove any boot is the toe-heel method. |
Things to Do After Using Your Hiking Boots
6. How to Remove Boots Correctly
All right be honest now. Do you ever use the toe-heel method of taking off your boots? You step on the heel to hold the boot down and you yank with your other foot to get the boot off. We’ve all done it at one point or another, but now that you’re following these tips to take good care of your boots you won’t be doing that anymore.
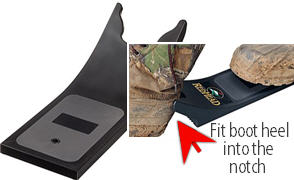 |
| RedHead Boot Jack |
When you take off your boots using the toe-heel method you’re putting a ton of unnecessary stress on the heel stitching and material that will compromise the heel of your boots over time. So do it the right way from now on. You can use a boot jack like the RedHead Boot Jack. Or, simply unlace your boots fully and slip on and off like a person who wants their boots to last. Sure it might take an extra few seconds, but it’ll be worth it.
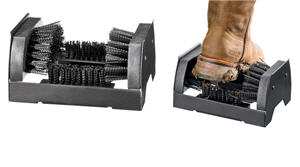 |
| Clean the sides and bottom of your boots or shoes at the same time with the RedHead® Boot Scrubber. |
7. How to Clean Hiking Boots After Each Use
The chances are pretty good that you’re not on well-maintained trails every time you head for the woods. Odds are you come home with caked snow, dirt, mud, and other debris clinging to your boots. All that grit from the trail can break down leather over time, which is why it’s always best to remove any dirt as soon as you get home. Better yet, use a boot scrubber like the RedHead Boot Scrubber to remove dirt before you even take them off. It doesn’t take long, and chances are if you don’t do it right away you’ll probably forget.
If there’s only a light amount of dust and dirt you should just be able to wipe your hiking boots down with a damp paper towel and let them dry, the right way of course. If you do enjoy hitting the trails hard and often come home with loads of gunk glued to your boots, then you should take a more aggressive approach. Try using a boot scrubber to get that nasty stuff off.
8. Remove Insoles and Deodorize
It’s important to always remove liners or insoles to dry and deodorize separately. Try to make it a habit to remove the insoles of your boots after every hiking trip. This will make the drying process go much quicker, allow the insole to recover and the material to decompress after being squished all day.
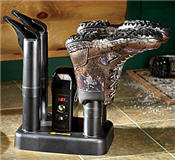 |
| PEET Dryer Advantage Shoe Dryer |
9. Learn to Dry Your Boots the Right Way
It’s easy to end up with soaking wet boots after a few hours of hiking in the snow. When drying your boots, it’s honestly more about what not to do than it is about what to do. Always remember to never dry your boots without cleaning them as thoroughly as possible first, and never dry boots with an intense heat source like a fireplace, stove, furnace, vent, or blow dryer. We know it’s tempting after you come back from a snowy, wet hike, but don’t do it!
After cleaning your boots thoroughly, position them upside down on a boot dryer so any water collected inside the boot will drip out when drying. Boot driers such as the PEET Dryer Advantage Shoe Dryer are great because they gently circulate air inside your boots without causing any damage. And if you need a lightweight alternative you can use a portable boot dryer and warmer that easily slips into your boots.
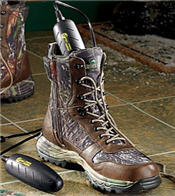 |
| PEET Drop-In Footwear DryerPEET Drop-In Footwear Dryer |
If your boots are exceptionally wet on the inside or you don’t have access to power for a boot drier like the PEET Drop-In Footwear Dryer, you can crumple up some newspaper to speed up the drying process. Remember to air dry only – never put leather products in the way of a direct heat source.
10. Keep an Eye on Boot Stitching and Heels
If your hiking boots are going to fail, it’s probably going to be more than likely they will fail at the seams. Anywhere there is stitching on your boot there is an inherently weak spot. Traversing rocky terrain can quickly wear stitching. You’ve been warned. The heels of your boots take a ton of abuse on the trail. If you’re the type of hiker that likes to drag their feet, or more specifically their heels, slowly but surely the heels of your boots will begin to wear down. We like to inspect the souls of our boots after every hike and checking for heel wear is just another part of that.
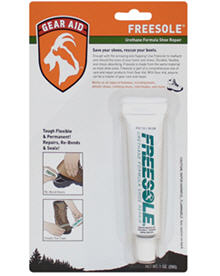 |
| Gear Aid Shoe Repair Adhesive |
And if your heels are showing signs of wear, take your boots to get re-soled. It’s far less expensive than buying a new pair of boots, and you don’t even have to worry about breaking a new pair in. If it’s not that bad you can also try mending the boots yourself with a shoe repair kit such as Gear Aid Freesole Shoe Repair Adhesive.
Six Expert Tips for Winter Hiking
11. How to Get Better Traction With Your Boots
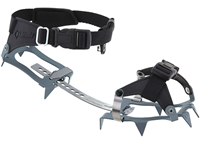 |
| Kahtoola Crampons |
When you hit an icy trail, crampons can be the difference between having a good time and having to turn around and head home. If you’re new to crampons like the Kahtoola K-10 Crampons, it’s important to read up on technique and start out by using them on a fairly easy trail, because it’s easy to injure yourself if you use them improperly. Practice putting them on and taking them off. Ask a friend to teach you their techniques for using crampons both uphill and downhill, and always remember to take your time and start out slow to avoid accidents. Remember, crampons are literally metal spikes attached to your feet.
Other Ways to Get Traction on Snow and Ice
Snowshoes and other traction devices can also be a great option for hiking through the snowy wilderness. Compared to crampons, snowshoes are more for fun, casual, winter hiking. You’ll want a blend of good technology, comfort, and convenience in your snowshoes that are ready to tackle a variety of terrains and adventures. Climbing steep slopes will be easier than ever. A huge plus with snowshoes is that there’s really not much of a learning curve. You just strap them on and start tromping through the snow.
![]()
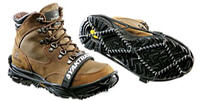 |
| Yaktrax Traction Devices |
The same applies for Yaktrax Pro Traction Devices for boots and shoes, but they’re a much lighter and easier to use option, giving you the same traction benefits on slippery winter surfaces while provided the natural stability and multi-directional support you’re looking for
12. Dress in Layers for Winter Hiking
The Base Layer:
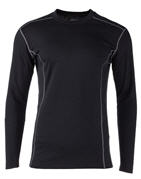
The base layer next to your skin should quickly pull away, but not hold moisture. It should wick it though very quickly to the next layer out. It should be thin and made of a high-tech, synthetic material. Good examples for this layer are thermal pants, thermal top and socks.
The Mid Layer:
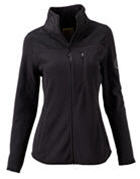
The second layer out or mid layer clothing should be a soft, light to medium weight blanket of insulation. Consider a fleece jacket like or shirt. You have a couple options here. Synthetic fleece is good and merino wool is great. But remember to look for garments with good loft that are still good at wicking moisture.
Outer Layer:
The next layer should be a protective outerwear layer that’s waterproof and windproof like the Columbia Summit Crest Interchange jacket in case you run into sleet, snow, wind, or any other nasty combination Mother Nature throws your way. Which is likely to happen in winter.
 |
 |
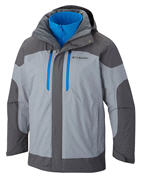 |
| Base Layer | Mid Layer Fleece |
Outer Layer Jacket |
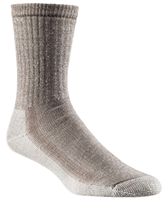 13. Consider Carrying a Backup Layer
If you were to carry anything extra in your pack, socks like the Smartwool Hiking Socks would be a great choice. Even if you have the highest quality boots made, there’s always a chance you can somehow end up with damp and chilled feet from perspiration or precipitation of some kind. You just never know, especially when you’re out hiking in the snow. So put an extra pair of dry wool socks in a Ziploc baggie and throw them in your pack for those just in case moments.
14. Be Prepared to Cover Your Face
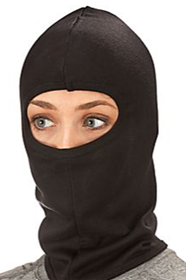
Depending on where you’re hiking in the winter, you may face subzero temperatures that can lead to frost bite and worse. However, there’s nothing to be afraid of if you hit the trail well prepared. When hiking in the winter, a key factor to staying comfortable and safe is covering your face when needed. Try a balaclava. You won’t regret it.
15. Use Hand and Foot Warming Comfort
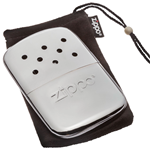 Hand Warmers: If you’re planning to be out on the cold trail for a while hand warmers are the perfect choice to keep handy. The Zippo Outdoor Deluxe Hand Warmer Pocket Heater is a friendly and reusable 12-Hour Hand Warmer. Of course being dressed appropriately will play a huge role in keeping you comfortable, but having a hand warmer available will make a world of difference.
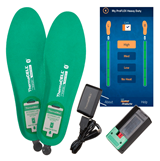 Foot Warmers: Using toe and foot warmers for winter temperatures and snow-pack helps keeps the cold from creeping in through the soles of your hiking boots. Heated insoles are considered the next generation of foot warming comfort. These revolutionary insoles provide warmth literally at the touch of a button. You can simply operate the temperature of your insoles straight from your smartphone. So no matter what extreme environment you face, your feet will be ready to roll when you are. ThermaCELL’s heated insoles feature up to eight and a half hours of warmth per charge.
 16. For Your Survival Stay Hydrated
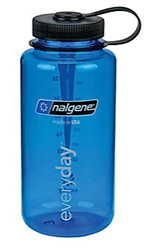
Make sure to bring water with you on the trail. It’s important to stay hydrated, especially in the winter with the air being so dry. Your skin will dry out and you’ll get dehydrated a lot faster in cooler temps. The Platypus® Hoser™ 3.0 Hydration Reservoir System is a good choice for for hiking or backpacking because of their low profile design and easy hauling capability. Another alternative is carry a water bottle. The top rated Nalgene Everyday Wide Mouth water bottle is lightweight so less ounces to carry for hiking or backpacking. Attach to your pack with a hiking clip.
- 5493 views


