In my last blog I discussed several tips to tapping maple trees to collect sap. Now that you have all this sap on hand, the course changes from collecting to processing.
 |
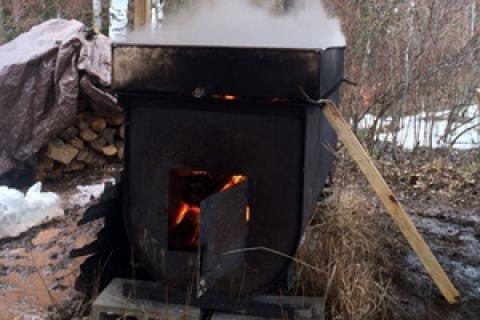
| Because of the large amount of steam produced as you boil sap, it's best to do this outside — such as this "Sugar Shack". |
Boiling down maple sap to maple syrup is certainly not a difficult task; it is merely a process of working through the many steps in the finishing process. Regardless of what you may have heard about the sugar content of trees, etc., it roughly takes 40 gallons of sap to make 1 gallon of syrup. I will say that again just to be clear for those that are faint of heart — the process of finishing your syrup is a 40 to 1 ratio of sap to syrup. This means that although you may be able to collect sap fast, it is going to be a slow process to cook it down.
Because of the large quantity of steam that gets produced as you boil sap, it is recommended that you find a place outdoors to boil. Many folks in northern Wisconsin set up what are called "Sugar Shacks" in the woods where this processing can be done.
The Process
Heat Source: About any old drum or metal bin or pit can be used to set up a fire. Try to use clean burning hardwoods like maple or oak for your fire as other woods like pine will produce excess amounts of soot that will fall into your syrup. Build you fire in your drum or pit with dried, split wood and keep stoking the fire intermittently so that it stays as hot as possible. Depending on the amount of sap you have collected, estimate that you will have to boil your sap for several hours so having a sufficient wood supply to begin with will save you many headaches during the boiling process.
Boiling the sap: You are going to need a large pan or pot to do the cooking down of your sap. If you plan on setting up a sugar shack, then investing in a quality pan to begin with will make the process all that much easier. Once you have picked your pan or pot, fill it 3/4 full with sap. Place the pan or pot onto the heat source and bring the sap to a boil. Once the sap starts to boil down to 1/2 the depth of the pot, add more sap. As you boil the sap it will slowly start to take on a golden color. Once the sap has "mostly" boiled down, and you notice that the bubbles are starting to change and don't have that fluid texture (more like a foam), it is time to transfer the sap.
Complete the boiling: Finishing your sap should be done on the stove or small propane burner, as you can control the heat much easier than over an open fire. As the sap gets close to the finished product, it has a tendency to boil over so you have to keep a close eye on things. Continue to boil the sap until it takes on a consistency of syrup. Checking the sap with a candy thermometer is one of the ways to know it is ready. You should cook the sap until it reaches 7 degrees Fahrenheit above the boiling point of water. Note that the boiling point of water differs based on your elevation. For example, in my neck of the woods the boiling point of water is 212 F so I cook my sap until it reaches a temperature of 219 F. (To help find the boiling point in your area, visit this website: Water Altitude Boiling Point Calculator.)
Filtering the syrup: The last step in the finishing process is to filter your sap. Even if you filter it before you add it to the finishing pot; a small amount of sediment will be present in your finished syrup. This sediment can be filtered out of your finished syrup using a food grade felt filter.
Bottle your syrup: Sterilize jars or bottles (or multiples of each depending on how much syrup you have produced) in boiling water bath for 10 minutes. Pour the hot sediment free syrup into the jars or bottles, cap it, and allow it to cool.
This is a very time consuming process, but well worth the effort for the taste of real maple syrup made from your land. It makes me appreciate the process that goes into the final product, and in a way, it marks the passage into spring and gets me outside on days with less than pleasant weather.
- 3189 views

