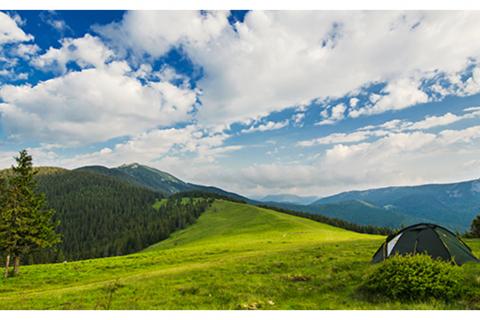
Taking your camping excursion off the beaten path is a wonderful way to explore the beauty of nature and find peace and solitude in the remote outdoors. If you are ready to bypass the crowds and connect with Mother Nature in all her primitive glory, consider a backcountry camping adventure. This type of camping is not something you do on a whim, however, and if you want to give it a shot, it is vital you are properly prepared.
Choosing a Destination
You will backpack to your destination, so think about your skill level, budget and time constraints. Most backpackers average two to three miles per hour, but a heavy pack, the elevation and the condition of the trail could slow you down. When determining how many miles you will travel, factor in the trail type (Will you go out and back? Make a loop?) and think if you want to keep a leisurely pace or cover as much ground as possible.
Also consider the time of year. While midsummer is the perfect time for an excursion in High Sierra, it is not a good idea to explore the Utah Canyon Lands (the area is prone to flash floods and temperatures regularly exceed 100 degrees Fahrenheit during the summer). The terrain and the climate will also determine how much water you will bring and what type of clothing you will pack.
If you plan to explore the backcountry in the National Park System, be prepared to fill out a backcountry camping application. You will also need to obtain a backcountry permit from the National Park Service. Check to see if your location has any wilderness regulations or campfire restrictions in effect.
Pack and Gear
Pack sizes are measured in liters. For trips ranging from one to three days, packs with a 35- to 50-liter capacity are best. Trips that last three or more days call for a pack that can hold 50 to 80 liters. Extended backcountry camping trips (five or more nights) require a pack that is 70 liters or larger.
Of course, the heavier the pack, the slower you will go. Although lightweight packs are generally more expensive than bulkier gear, most backpackers find the expense worth it.
What goes into the pack depends on the location and duration of your trip, but in most circumstances, backcountry campers should include these items:
Clothing:
- Synthetic or wool socks, not cotton (one pair for every two days; one pair per day if your feet perspire heavily)
- Long underwear (weight dependent on expected temperatures)
- Midlayer items (hoodie or fleece)
- Merino or synthetic T-shirt
- Synthetic long-sleeve shirt
- Synthetic hiking pants or shorts
- Waterproof gear (jackets and pants)
- Beanie
- Lightweight fleece gloves
- Slip-on camp shoes
- Lightweight puffy jacket
Sleeping Gear:
- Closed-cell foam or inflatable pad
- Three-season tent
- Down or synthetic sleeping bag
Cooking Items:
- Water filter
- Sponge
- Biodegradable soap
- Eating utensils (bowl, cup, spork)
- Pot set
- Backpacking stove
- Fuel
- Bags for packing out any trash that can't be burned
Emergency Essentials:
- First-aid kit
- Headlamp with extra batteries
- Waterproof matches and lighter
- Dry tinder (dryer lint, cotton balls saturated with petroleum jelly, etc.) in a zip-top bag
- GPS/PLB device and maps
- Compass (and the knowledge to use it)
- Duct tape
- Pocket knife
- Whistle, mirror or other signaling device
Your backpack is broken up into five sections: the lid, sides and top, center, bottom and outside. How you pack your backpack will factor in to how comfortable you are during your trek. Keep these guidelines in mind:
- Pack heavier items, like water and cooking gear, near the center of your pack. Keeping heavy items in the middle close to your center of gravity will help you maintain your balance out on the trail.
- Pack lighter items around heavier gear.
- Maps, snacks and small items like cameras can be kept in the side pockets or in the lid.
- Put the sleeping pad at the bottom of the pack and the sleeping bag on the outside of your pack.
- The sides and top of the bag should be able to hold your tent and your clothing as well as other lightweight items.
Food and Water
Proper hydration is essential. Carry at least two liters of water per day, more if you are backpacking in hot weather. Take along a water purification system or tablets; carrying these items will cut back on how much heavy water you are toting around. Locate natural springs on your map and check with the local ranger on the status of springs. In dry climates, natural springs can dry up, so call ahead.
Packing dehydrated food is the easiest way to cut weight from your pack; foods like pasta sauces, fruits and vegetables all can be dehydrated. Take lightweight food items with a dry base like rice, oatmeal and couscous. But not all camp meals have to be dehydrated. Hot meals can boost your morale out on the trail and extras like a block of cheese or a chocolate bar can enliven your spirits.
Remember, if you are hiking in bear country be sure to hang your food as high as possible or carry a bear-proof canister. At the very minimum, store your food in a secure sack far away from where you pitch your tent.
Six Weeks Out
Test out your gear, break in your hiking boots and get in shape in the six weeks leading up to your backcountry camping trip. Start by:
- Becoming familiar with your camping gear. It is as easy as setting up your tent and sleeping gear in your backyard and experimenting with your cooking stove. A short overnighter in a terrain similar to your camping destination with your gear in tow also can help you prepare for longer trips.
- Taking short day hikes to break in your hiking boots. If you feel any pinching in the forefoot or bumps or seams in the sole, the boots are not right.
- Depending on your fitness level, running, taking short day hikes and walking uphill with a weighted pack will increase leg strength as well as cardiovascular fitness. Additional exercises that are good for hikers include planks, squats and wall sits. These workouts can all be done with your body weight, or you can use added weight to increase your physical strength. Always check with your doctor before starting a new exercise program.
- 2430 views