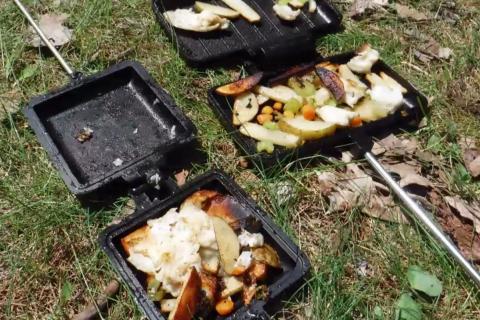
Cooking pudgy pies with a pie iron over an open fire is usually thought of as something to keep the kiddies occupied during a camping trip. They turn out grilled cheese sandwiches, toasted PB & J's, and s’mores and go away happy with the evidence on their cheeks. But wait, what about the grown-ups?
Pie Iron Recipes for Grown-Ups
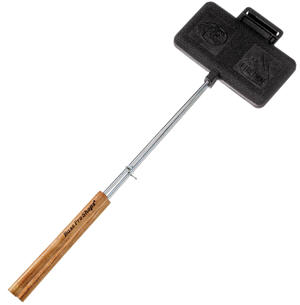 |
| Bass Pro Shops Double Camp Fire Iron |
With a little imagination and some careful selection of ingredients, the lowly pie iron can turn out some unbelievable dishes that will satisfy even a sophisticated adult palate. Get creative and you can come up with dishes you’d never have thought about making in a campfire iron like the Bass Pro Shops Double Camp Fire Iron. These single-serving baking containers are for more than just sandwiches. Think seafood. Think vegetables. Think desserts.
What’s your favorite hot sandwich? We’ll bet you can recreate it in a pie iron. Here are a few recipes we’re sure will provide you inspiration to get started.
![]() Tip: Shop top customer rated Rome Round and Pudgy Pie Iron here
Tip: Shop top customer rated Rome Round and Pudgy Pie Iron here
![]() Tip: Shop single pie iron here
Tip: Shop single pie iron here
Pie Iron Lobster Roll Recipe
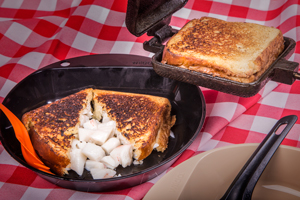 While you can buy lobster rolls all over New England, you can make your own campsite version with your trusty pie iron. It’s really simple and delicious. If you’re not in lobster country (which most of us aren’t), you can substitute imitation crab meat, but nothing can truly substitute for real lobster meat.
Ingredients
- 3-4 oz of lobster meat chunks per sandwich
- White bread (English Muffin Toasting Bread works best if you can get it)
- Butter (lots of it)
- Lemon
- Mayonnaise
- Your favorite hot sauce
- Salt & Pepper
Instructions
- For four sandwiches, melt at least a stick of butter in a pot.
- When it’s completely melted, remove from heat and add lobster meat.
- Squeeze juice of lemon into the pot, and add a dash or two of hot sauce.
- Mix to coat lobster thoroughly with butter, lemon, hot sauce, but don’t over stir to break up the meat too fine.
- Generously spread one side of a slice of bread with mayo, and lay it spread side down in pie iron.
- Spoon lobster mix on top of bread.
- Generously spread another slice of bread with mayo, and lay dry side down on top of lobster.
- Attach top half of pie iron and close.
- Heat over coals of campfire, grill, or camp stove on low until both sides of bread are toasted a deep golden brown.
- Remove the pie from pie iron and enjoy, but be cautious because filling will be hot.
Pie Iron Scallops & Squash Recipe
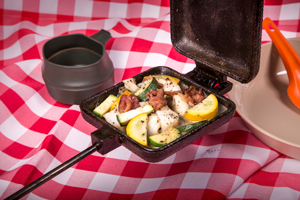 Here’s a case of cooking in a pie iron with no bread involved at all. Just delicious fresh ingredients. This one can even make a squash lover from a squash hater. Just try it!
Ingredients
- Bacon
- Scallops
- Small zucchini and/or yellow summer squash
- Small onion (finely chopped)
- Garlic (minced – in jar is most convenient)
- Salt and Pepper
- Real Butter
Instructions
- Fry bacon crisp; set aside. Reserve bacon drippings.
- Cut squash lengthwise, then slice into half discs slightly less than ¼-inch thick.
- Generously butter inside of pie iron.
- Add scallops (3-4 if your using large sea scallops, about a dozen if you’re using small bay scallops)
- Add a pinch of chopped onion and a pinch of minced garlic.
- Fill out space in pie iron with squash slices.
- Add about ½ tsp. of reserved bacon drippings for nice smoky flavor.
- Sprinkle with salt and pepper.
- Close up pie iron and cook over campfire coals, grill, or camp stove on low.
- Move and turn frequently until steam is coming from sides of pie iron. Turn carefully to avoid too much of juices getting out.
- Carefully open pie iron and dump contents into serving bowl.
- Add more salt and pepper to taste.
- Add crispy bacon pieces on top as garnish.
Pie Iron Brown Bread & Baked Beans Recipe
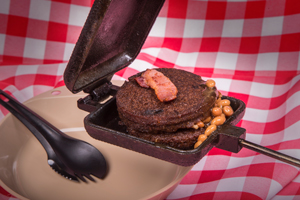 Never heard of a baked bean sandwich? Oh, they are “a thing.” They’re good cold, but they are great hot – especially with authentic brown bread from a can. Bacon, baked beans, bread in a can – what ingredients could be more camping friendly?
Ingredients
- 1 can B&M Brown Bread (original is great; with raisins adds a nice sweetness)
- 1 can or jar favorite baked beans (try a Boston Bean version for authenticity)
- 2 strips of bacon per sandwich
- Finely chopped onion (optional)
- Butter
Instructions
- Fry bacon to almost crispy, and set aside on paper towel.
- Open both ends of can and remove brown bread. Cut into slices just under ½-inch thick.
- One side of a slice of brown bread and place with butter out into one half of pie iron.
- Lay two slices of bacon on the brown bread. Break and arrange as necessary to stay inside the pie iron.
- Spoon a couple of big tablespoons of beans on top of bacon.
- Add a couple of pinches of chopped onion if desired.
- Butter another slice of brown bread on one side, and place it with unbuttered side to beans.
- Attach other half of pie iron and close.
- Heat over coals of campfire, grill, or camp stove on low until outside of brown bread is well-toasted.
Pie Iron Salmon Hot Brown Sandwich Recipe
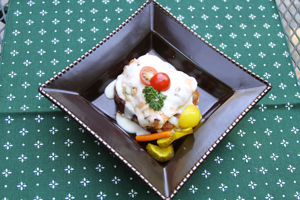 The original Hot Brown Sandwich was created in the Roaring ‘20s at the Brown Hotel in Lexington, Kentucky. It was a late-night treat (or early, early morning breakfast) for hundreds of guests who attended night dinner/dance parties at the hotel. Traditionally made with shaved turkey and ham, our pie iron version takes on a different delectable twist by topping it with salmon instead. This is grown-up campfire food everyone will enjoy!
Sandwich Ingredients
- Pre-sliced English Muffin Toasting bread
- Delicious, late-summer, homegrown, vine-ripened tomatoes (select a meaty, low juice variety for best results)
- Grated sharp white cheddar and Monterey Jack cheeses – equal portions allowing about ¼ cup per sandwich
- Salmon fillet with pin bones removed, but skin on – allow about 4 ounces per sandwich
- Softened butter
- Olive oil
- Salt and white pepper
Sandwich Instructions
- Butter both sides of two slices of bread.
- Lay buttered slices into the two halves of the pie iron.
- Sprinkle about 1 tablespoon of grated cheese onto one slice of bread.
- Slice tomato ¼- to 3/8-inch thick and lay slice on top of cheese.
- Add another tablespoon of grated cheese on top of tomato slice.
- Top with other slice of bread by attaching the other half of sandwich iron and “seal” it up by hooking the clasp on the sandwich iron handle.
- Place salmon seasoned with olive oil, salt and pepper skin side down on cooking grate on heated grill and cook as usual.
- In the meantime, toast the sandwich in the pie iron.
- Move the iron continuously over the heat, checking often after a couple of minutes. Flip the pie iron often.
- Sandwich is done when the bread is toasted to a deep golden brown and some melted cheese may squeeze through the edges. Remove burnt edges from sandwich if there are any.
- Keep sandwich warm, wrapped in foil at back of grill until salmon and Mornay sauce are ready.
- Grill salmon until warm all the way through with just a hint of pink at the middle of thickest part of fillet. Remove skin before serving.
- Plate sandwich with generous portion of salmon on top and cover sparingly with Mornay Sauce.
- Serve hot!
Mornay Sauce Ingredients
- 3 tbsp butter
- 3 tbsp flour
- 2 cups milk
- Salt
- White pepper
- Pinch of nutmeg
- 1¼ cup grated Parmigiano-Reggiano cheese
- 1/8 cup grated sharp white cheddar cheese
- 1/8 cup grated Monterey Jack cheese
Mornay Sauce Instructions
- In saucepan or skillet over medium heat, melt butter.
- Stir in flour and cook for two minutes, but do not let the butter/flour brown.
- Whisk in milk, ½ cup at a time. Stir constantly to avoid lumps.
- Season with salt, pepper and nutmeg.
- Cook the sauce, stirring constantly for 4-6 minutes. Be diligent about stirring out any lumps that appear.
- Remove from heat and whisk in cheeses until they are completely melted. Use varieties and amounts of cheese to your taste, however, for this sandwich, with the delicate flavor of the salmon, do not make the sauce too strong in flavor – just a hint of cheesiness. Mornay Sauce can be made ahead of time and gently reheated stirring often!
Pie Iron Whoopie Pie S'more Recipe
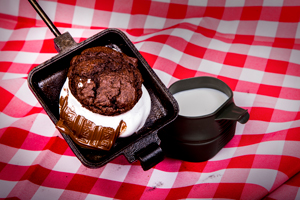 A whoopie pie is sandwich of two large soft chocolate cookies with a sugary filling in between. Depending on what part of the country you find your whoopie pies, you’ll find not all are chocolate and flavors actually vary widely. Pick what you like.
When selecting your Whoopie Pies for this recipe, be sure to find ones that will reasonably fit in your pie irons – though the trimmings are might good eating, too.
Ingredients
- Chocolate Whoopie Pies (from bakery)
- Butter
- Marshmallow cream (optional)
- Milk chocolate bars (optional)
- Cold milk (on the side)
Instructions
- Generously butter inside of pie iron.
- Place Whoopie Pie in pie iron and trim away edges where it would stick out.
- Eat delicious trimmings.
- Add marshmallow cream and/or chocolate bar pieces between cookies (if desired, but probably unnecessary.
- Close up pie iron and toast over campfire coals, grill, or camp stove on low.
- Check frequently until both sides of Whoopie Pie begin to toast.
- Remove and eat with a cold glass of milk on the side.
How to Fix a Fish Lunch in a Fire Iron
- 14132 views

