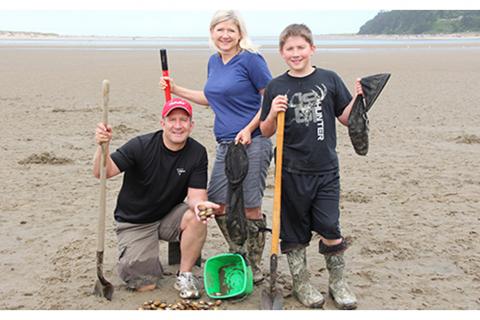
Clamming is very cost-effective, requiring minimal gear. Many people already have the gear needed to clam successfully, and with the purchase of a shellfish or clamming license, that’s all that’s needed to have a fun day.
Here’s a look at the gear a clammer might find useful from Alaska, through British Columbia, along the Washington and Oregon coasts, down to California. Along this vast stretch of coastline lies a wide-range of habitats and conditions, along with a variety of clams to be pursued.
In addition to a shellfish license, a tide book that shows the tidal changes, year-round, in every region along the Pacific Coast can be helpful. Tide tables are available online, but having a hard copy is great for quick reference.
In terms of physical gear needed for clamming, the most widely used is a shovel.
Specially designed clam shovels are ideal to get the most out of your beach clamming experience, especially for razor clams. Narrow-bladed clam shovels also work well for digging some bay clams. When digging bay clams where large amounts of substrate must be excavated, a regular garden shovel works well.
A rake often is used when going after bay clams. A simple steel garden rake can suffice, but many clammers prefer longer pronged rakes to dig deeper into the sand.
For carrying your catch, specially made clamming bags that attach to a belt are ideal and offer mobility. Buckets work to carry clams, but can get washed away by a wave surge.
Note rules regarding the requirement of each clammer to carry his or her own catch and transport vessel.
There are two types of clam guns: a fixed tube and a pump-action tube.
The fixed tube is a cylindrical piece of metal with a handle and small hole on the top end. As you push the gun into the sand, leave the hole in the top, open, pushing and twisting with the show (clam’s breathing hole) centered. When you’ve reached a foot or so in depth, place a thumb over the hole and use your legs to lift the gun and the sandy contents. Empty the sand to the side and search for a clam. If no clam is found, repeat the process.
A pump-action clam gun is smaller than the fixed cylinder style, and some states have minimum laws that clarify what the diameter of the tube should be.
Clam shells are sharp and fragments are routinely encountered when digging and reaching into substrates. Wearing rubber gardening gloves, ones that are firm yet flexible enough to offer dexterity, is wise.
Often, the best way to transport clams home is alive in saltwater. For this, take along a cooler and add fresh saltwater with the clams. An aerator can be included, providing valued oxygen. Some clams can be transported out of water, with wet towels or grass (avoid using eel grass) placed over them.
Where you’re clamming, the substrate conditions and weather all factor in to what boots to wear. Many clammers wear chest of hip waders, no matter what, which is ideal for keeping clean and warm on cold days.
Others prefer hip boots or knee boots. Sometimes, tossing all three into the rig is a good idea, then you can decide what to wear when you reach the clamming grounds. On summer days, old tennis shoes make it easy.
Depending on what boots you wear, rain gear is often used. Cold days will warrant heavier clothes than warm, rainy days, so layer just as you would for a hike or outside workout.
When clamming at night, take a headlamp and keep extra batteries easy to access. Wrap some reflector tape around all loose gear: rakes, shovels, buckets, clam guns, etc., so if you set them down, you can easily locate them.
Heated clothes have come a long way, and vests, socks and pants can keep you comfortable on the coldest of days. ThermaCell’s remote controlled Heated Insoles are great when clamming in the cold, as are their Heat Packs for keeping hands warm. Cabela’s Men’s Heated Performance Vest is perfect for cold-weather clamming.
With many clam species to be pursued, knowing what gear to taken, when and where, will help make your time afield more efficient.
- 15052 views

