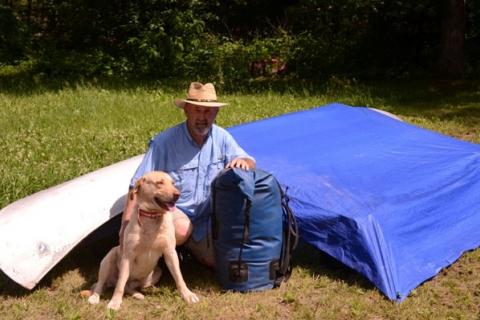
Camping along the riverbanks makes for a great summer floating experience. If you're concerned about packing all the gear you'll need to do this in your canoe, leave the tent at home. You already have your shelter — your canoe. And depending on how large your canoe is, it can work for multiple campers.
A Very Short Float & Camp Gear List
Following is perhaps the shortest gear list you will ever see for an outdoor adventure. Using a canoe for a shelter involves very little equipment.
Canoe — The length of your canoe will be determined by the number of people you intend to house under your canoe shelter. A 13-foot model is perfect for one person; there will still be room left over to stow gear, as well. The 17- and 19-foot canoes are best for two people.
Tarp — I have used everything from plastic garbage bags to canvas tarps for covers to stake over a canoe for shelter. But I suggest going with tarps with reinforced metal grommets for guide ropes.
Rope — Lightweight ropes or parachute cord is necessary to tie the cover down on both sides of the canoe, thus creating a weather proof cover.
Stakes — Some type of anchor or stake is essential to hold your cover down. Coleman makes long 10-inch stakes that looks like big nails. They work beautifully on solid ground surfaces. Some gravel bars will be too loose to use metal or plastic stakes. In this case, you will have to use rocks or logs as rope anchors. On occasion I have used one liter bottles of water.
Paddles, poles or sticks — These items are used to create lift in the tarp, if you want. A sloped peak will turn rain water quickly and give you a little more head room in your make shift shelter.
Sleeping pad and bag — If you prefer some padding for your gravel bar bed, a 3/4-length backpacking sleeping pad is perfect. Add a light weight sleeping bag and you are set.
4 Steps to Setting Up a Canoe Shelter
With the right equipment, a canoe shelter only takes minutes to erect.
|
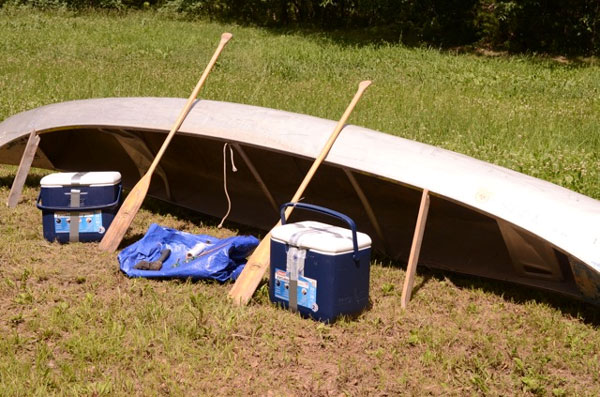
Step 1 Find a level spot and flip the canoe over. The big decision is whether to face the canoe opening toward the camp fire or the running water of the river. Use a forked stick or 1-by-2-inch board cut to length to prop the front edge of the canoe up to give you additional room underneath. Practice this maneuver at home so the routine is perfected before getting on the river.
|
|
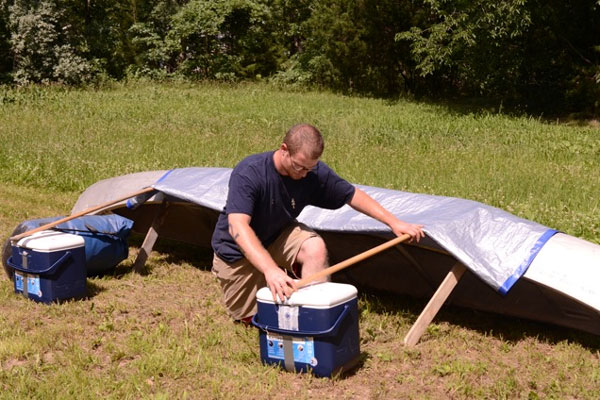
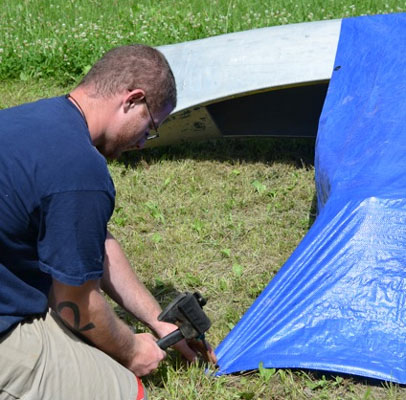
Step 2 Drape your cover over the canoe. Pull just enough cover to the back of the canoe to allow you to tie guide ropes to rocks, tent stakes or one liter bottles of water. After the rear guide ropes are secure, lay paddles or poles perpendicular to a set of forked sticks, stakes or small coolers.
|
|
Step 3 Most of the cover should be to the front, stretched to another set of forked sticks or stakes. Guide ropes can then be ran through the forks and anchored with tent stakes, rocks or small logs. The cover should slope from the canoe to the stakes out front to facilitate water runoff. This step may be skipped and the tarp can be stretched over the canoe to stakes out front. This method will provide less room underneath the tarp.
|
|
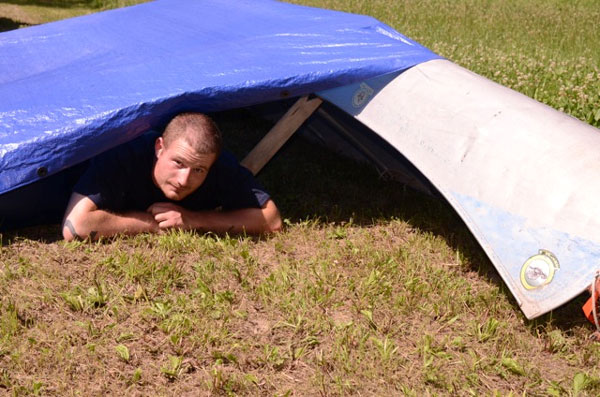
Step 4 Test your canoe shelter out!
|
Things to Consider When Using a Canoe Shelter
In rainy weather, tuck as far up under the canoe as possible to avoid possible leaks in your cover.
As a last note, inform any canoe partners ahead of time that you are using your canoe as shelter. The first time I tried a canoe shelter, it was the middle of October, a bit chilly and it began to rain. My wife asked if I could get the tent set up. She slept dry as a bone under the tent shelter. I did discover, however, that a couple of big plastic garbage bags make great emergency shelters.
- 10096 views


