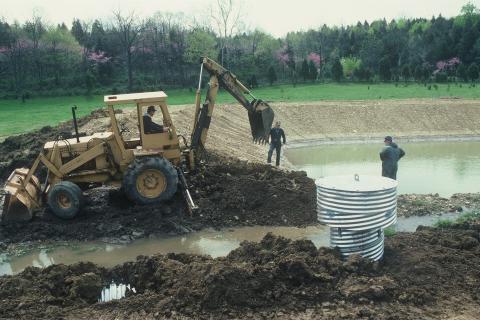
There are many advantages to building your own ponds, from wildlife viewing to hunting, serious angling to teaching youngsters to fish, not to mention improving your property’s value. Here are more details on how to plan your pond and make this dream a reality.
The author has built four ponds on his property. Each offered different challenges and different rewards. Some are prime bass fishing spots. Two are great wood duck and mallard hangouts. Others attract and hold mature bucks on the property, 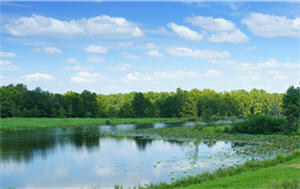 offering vital water and cover in close proximity to this popular big game animal.
1. Where to Locate the Pond
This is a major decision that the Natural Resources Conservation Service and state fishery biologists will help you with. The ideal location is where the contour of the land dips towards a natural site, perhaps with several side-hills sloping down into a low area. A flat area in a small valley is also potentially good spot, or a low spot that’s fed by springs or streams that drain into it after rains.
Tip: You can dam up a small all-weather creek, but be sure you find out how much water flows after heavy rains. It may be too much and could flood your pond, causing damage to the dam or washing out fish. In this case you might want to consider constructing the pond off to one side of the creek and have a channel leading to it from the stream, with a gate that can be opened and shut to control the amount of water that enters the pond. This results in greater stability and allows you to manipulate the water level if you want to grow aquatic plants in shallow areas to attract waterfowl and then flood them to the desired depth.
In many cases a contractor or excavator who has experience building ponds may be able to plan and create the pond by his or herself with input from the NRCS and biologists. In other cases, you may need to hire an engineer to help lay out your pond. Talk to neighbors who have built ponds and see how they designed theirs and what problems they might have run into.
2. Pond Drain Pipes & Spillways are Safety Features
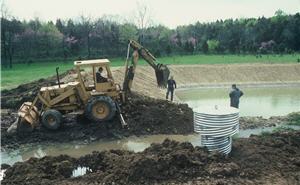
Thinking about your ponds drain design, a pond that simply accepts the drainage from a few sidehills, a drainpipe of 6-18 inches in diameter may suffice. For a pond draining a larger area, 18-36 inch pipes may be required. Galvanized steel is okay, but after 15-25 years there may be some deterioration and leakage. PVC is the other main choice and will last longer. Gates or valves to manipulate your pond level are also an option. That way you can close them when the pond needs filling or open them when you need to drain or partially lower it.
With some ponds that drain a limited area, you can get by with just a spillway. Actually two spillways are best—a main site and an emergency one that kicks in to drain additional water during heavy rains. Even if you go with a drainpipe, you need to have one spillway for overflow after downpours.
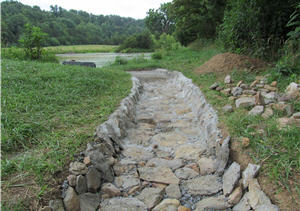
Tip: Don’t put a grate or screen across the spillway to prevent fish from escaping. It might clog up with debris.
Extra Tip: These spillway and drainpipe decisions you can certainly be involved in, but the engineer or contractor should have the final say. You could be liable if a dam fails and floods property downstream. Expert advice is best.
3. How to Determine the Size of Your Pond
Size is important in a pond, but surprisingly small ponds can be rewarding to build and own. Things to consider include the lay of the land, the abundance of the water source, and how fat your wallet is!
In some areas a one-third or half-acre pond may be all you can build before the change in elevation becomes too steep to increase the pond’s size. In open bottom land that drains a large area, you can almost create a pond as large as you can afford.
Tip: Ask your contractor to give you a couple of estimates so you can know the exact cost according to how large the pond is built. Try to go with the largest you can afford. But even a half-acre pond can provide great rewards for fishing, hunting, and wildlife viewing. So don’t feel bad if you have to build small. Go with what you can afford and maybe you’ll be able to build another larger one later.
4. How Deep Should You Dig Your Pond?
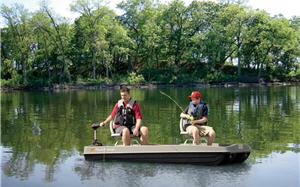 Depth of the pond will vary with the topography and your purposes. For most warm-water game fish ponds a minimum depth of six feet at the deepest spot is crucial. This allows the pond to retain sufficient oxygen during winter and summer months. If possible, try for 8-12 feet or more at the deep end in front of the dam when the pond is full.
Tip: Avoid having the pond taper up to very shallow water at the upper end. If possible, even that should be three feet or at least two feet. Less than that and weeds tend to become a problem.
Extra Tip: It’s vital that all topsoil be removed and a hard, impervious bottom be formed for the pond to hold water securely.
5. How do You Know What Should be in the Bottom of a Wildlife Pond?
If you’re digging in a sandy or rocky area, a pond may not hold water well, so it’s important to check ahead of time with a soil expert or the district office of soil and water conservation. Avoid sandy soils, rock, shale, and limestone areas when possible.
Ideally you want to find clay beneath the topsoil that can be packed down to form an impervious bottom. This material also swells up when it’s compacted and then becomes wet, helping seal any potential leads. If the bottom doesn’t appear likely to hold water well, you may have to haul in truck loads of bentonite, a volcanic material, to seal the bottom of the pond so that it will retain water. On small ponds, plastic pond liner sheeting can sometimes be used to line the bottom. Fortunately, these steps are rarely required if the site is chosen carefully.
Tip: If a pond leaks some during the first few months, don’t despair. Often it will seal itself as silt and mud wash in and spread out, clogging up the leaks.
Sometimes you can leave standing timber or brush in a pond when it’s built for fish cover. Usually, however, it’s best to completely clear the pond so the bottom can be packed and sealed with the bulldozer. Then you can add fish structures later—either natural or artificial. They can be added before the pond fills or afterwards.
Tip: If you like catching big bream such as bluegills and shellcrackers (redear sunfish), consider adding a truck load of small gravel spread out in a few shallow areas or coves where it won’t get silted over. This will make prime spawning habitat and spring fishing spots for those species.
6. What is the Best Fish for Stocking a Pond?
If you are fortunate to have a strong cold-water spring on your property, you may want to dig a fairly shallow pond and stock it with trout. Usually the best fish to go with are warm water species such as largemouth bass, bluegills, redear sunfish, and catfish. It’s generally prudent to avoid stocking crappies in small ponds. They tend to overpopulate the pond and become stunted.
State fishery biologists or private pond consultants can help you decide how many and what species of fish to put in the pond, depending on its size and other factors. Buy from a reputable live fish company so you make sure you get healthy stock.
Tip: A second option where legal is to catch fish in surrounding waters, put them in large coolers or live wells and stock them in your new fishing hole. This way you can start out with some good-sized fish to make the angling fun and productive from the start. Since you’re stocking adult specimens, you won’t need nearly as many this way. Hopefully they will breed the first year in the pond and restock it that way.
7. How to Decide on the Forage or Feeder Fish Species for Your Pond
The geography, rainfall and even soil and water quality of your ponds location will affect your forage species choices. Stocking minnows or shad in a pond is usually a good idea. Fathead minnows, shiners or local minnow varieties from nearby hatcheries will help make your gamefish healthy and those forage fish may reproduce. Young bluegills will also provide a good food source after they spawn.
Tip: Frogs and tadpoles will usually get in a pond naturally. Be sure to add them if they don’t appear on their own.
8. How do You Know When to Start Fertilizing Your Pond?
This is an option when a pond is excessively clear with low nutrient content. Consider it if you can see deeper than 24 inches through the water. It will increase plankton and zooplankton, which leads to a greater supply of minnows, crayfish, and aquatic insects, all of which help build the food chain.
Tip: If the pH of the pond is too low, you can add lime to raise it. This may be necessary so the pond can make use of the fertilizer. Add carefully so you don’t make it too high.

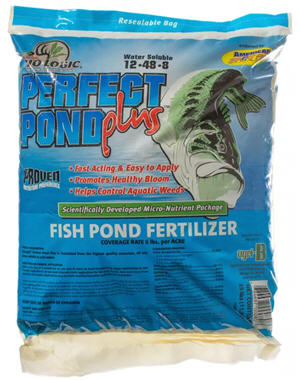
Tip: The Perfect Pond Plus Fertilizer from Mossy Oak BioLogic will grow bigger bass in your pond or small lake with its scientifically developed micronutrient package. This fertilizer supports the aquatic plant life and adds micronutrients that support the feeder fish that bass feed on.
9. What Type of Plants Can You Put in and Around a Farm Pond?
A pond will look pretty raw when you just finish it. By all means plant vegetation around the edges, and possibly even aquatic plants in the water in shallow areas to attract waterfowl and provide cover for minnows. Good choices include clover like the Imperial Whitetail Clover, orchard grass, switchgrass, bluestem, rye, and lespedeza, among others.
Tip: Check out Plant Identification at Texas A&M here
10. Check Into & Apply for Proper Permits to Build Your Pond
food plots for deer and other wildlife
easily and with minimal financial
investment.
The days have passed where you could just go out with a bulldozer and dig a pond where and when you want to. The USDA Natural Resources Conservation Service has design standards and specifications for construction of farm ponds. The state you live in may also have requirements and permits and require inspections during the construction process. Check with your states Department of Agriculture, here is a link to the NASDA State Directory.
Tip: Click to print or download the USDA Ponds-Planning, Design, Construction PDF
If flowing streams are involved, restrictions can be particularly strict. Fortunately, there are usually well-qualified friendly people at these departments who will walk you through the process. Just don’t try to short-cut the process by skipping any paperwork involved or you could have to remove the pond later.
Tip: Learn how to plant a food plot with this 10 step guide for beginners
- 64343 views

