For boaters and fishermen in northern states, it’s sad but true. Summer has slipped from our grasp and the cool winds of fall will soon turn into the first snow of winter. While there may still be time for a few more forays on the water, soon it will be time to stop thinking about winterizing your boat and start doing it.
Winterizing a boat may take a little time and effort, but it’s an investment that will pay off in the spring by helping to avoid time consuming, costly repairs and poor performance on your first outing next spring. Should you need a little incentive, most insurance policies do not cover damage caused by neglect or a lack of maintenance.
Before you begin this project, it’s a good idea to make a list of all tasks that need to be accomplished. Since memories are flawed, it’s best to consult your owner’s manual for both boat and motor(s) to review the manufacturer’s specific recommendations. If you’re unfamiliar with the mechanical facets of your boat, you may want to consider enlisting an experienced friend or hiring a professional to do the job.
Outboard engine(s)
The first task you should undertake is to use a flush muff or similar device to flush out the engine. Disconnect the fuel hose and run the engine until it stops, to remove all gas from the carburetor bowl to prevent the build-up of deposits from evaporated fuel. Fog the cylinders on two-stroke engines by spraying fogging oil through the carburetors while the engine is running. Continue spraying until saturated and smoke is visible from exhaust. For four-stroke engines, remove spark plugs and use fogging oil or a small amount of engine oil to lubricate the cylinder walls, spark plugs and pistons. Rotate the flywheel manually several times to distribute the oil in the cylinders. Inspect spark plugs for wear and carbon build up and replace or reinstall as needed.
The propeller shaft and threads should receive a coat of water resistant grease. Drain the lower unit lubricant and check for water. If no moisture is present, refill with lubricant and change plug seals. These seals have a form fit so they lose the ability to seal if reused. Always fill lower units from the bottom until it comes out of the top vent. Seal the top plug first, then seal the bottom plug next. Grease swivel joints to purge water and grease tilt tube. Drain all water from the engine and then wash it down with soap and water, rinsing thoroughly. Lubricate metal parts exposed to air and polish the exterior of the engine with a good wax.
Stern drive(s)
Inspect the stern drive thoroughly and remove any debris or barnacles accumulated from exposure to saltwater. Drain the gear case and check for moisture in the oil. The presence of excessive moisture indicates a leaking seal or crack in the casing, and repairs should be scheduled before refilling the case with oil. Drain the lower unit lubricant and check for water. If no moisture is present, refill with lubricant and change plug seals. These seals have a form fit so they lose the ability to seal if reused. Always fill lower units from the bottom until it comes out of the top vent. Seal the top plug first, then seal the bottom plug next. Units with a rubber boot should be inspected for cracks or pinholes and replaced if any are found. Lubricate all fittings with the proper grade of grease. Check fluid levels in hydraulic steering or lift pumps.
Inboard engine(s)
Start your engine and flush it thoroughly with fresh water while it is running. Allow the motor to run until it is warm, and then the oil and filter should be changed while it is still warm. Bringing a motor up to operating temperature will allow the impurities to be emulsified with the oil and drained away. Using a pickup hose from the water pump to a bucket of antifreeze, circulate the contents until the antifreeze starts to exit the exhaust. This procedure will vary slightly depending on whether your engine has a raw water-cooling system or and enclosed freshwater system. Carefully remove plug wires and spark plugs, and then squirt fogging oil into each cylinder to lubricate the cylinder walls, spark plugs and pistons. Lubricate exposed metal parts with WD-40 and use a shop towel sprayed with WD-40 to wipe down the engine’s surface. Loosen alternator and water pump to reduce tension on belts during winter. On boats that will not be stored indoors, tape the opening of the intake and exhaust manifolds with duck tape to help prevent corrosion of the upper cylinder.
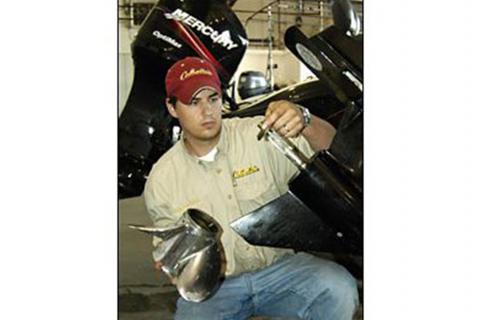
Prop
Remove and inspect the prop for grass or fishing line that can become imbedded in the seal. Lube shaft before replacing prop and torque nut to 50 foot-pounds on motors larger than 50 horsepower.

Bilges
Make certain that all bilges are clean and dry. Use hot water and soap with a stiff brush to clean up any oil or residue. Once clean, spray with a moisture displacing lubricant and add a little antifreeze to prevent any remaining or subsequent water from freezing.
Fuel
Change the fuel filter and water separator. Tanks should be topped off to avoid a build up of condensation and the inevitable rust that comes from moisture on metal surfaces. Add a fuel stabilizer, paying close attention to the manufacturer’s recommendation. Once the tank has been stabilized, ensure that you have a sufficient water supply, (flushers work well only at lower RPMs) and run the engine for at least 15 minutes, until system is saturated with stabilized fuel. Check the condition of all fuel hoses or lines and replace any that are cracked or degraded.
Battery(s)
Disconnect the battery cables and remove the battery from the boat. Clean the terminal ends and battery with a solution of baking soda and water, being careful not to get any soda into the battery cells. Rinse thoroughly with clean water. Coat battery terminals and the ends of all connecting cables with grease and store the battery in a cool, dry place that will not be exposed to freezing temperatures. Use a trickle charger to keep battery charged monthly, or use an automatic charger. Do not charge battery near any open flame or in a confined area.
Fresh water system
If you have a large boat with a freshwater holding tank, it should be drained completely, and the hot water heater as well. Check your owner’s manual to be certain that alcohol-based products will not damage your water system. Once you’ve received confirmation, the hot water heater should be isolated by disconnecting the "in" and "out" lines and joining them together. Once this is accomplished, open all faucets, shower and wash-down areas and pump non-toxic antifreeze into the system. Observe these openings until you see the antifreeze coming out and close all openings. Non-toxic antifreeze should also be installed in the water heater.
Head
Your holding tank should be pumped out at an approved facility. Use a bowl cleaner and add fresh water to the bowl flushing several times before completing the pumping process. Add antifreeze recommended by your boat’s manufacturer and pump through hoses, tank, valves, macerator and discharge hose.
Interior
Electronics, PFDs, fire extinguishers, flares, first aid kits and other valuables should be removed and examined for wear or the need for replacement or refurbishment. Remove cushions and store them in a climate-control environment or turn them up on edge to allow air to circulate to prevent mildew. On large boats with a cabin, install a dehumidifier or an odor/moisture absorber product to prevent mildew. Clean and leave the door open on the refrigerator. Open and clean all storage areas, drawers and lockers.

Controls
Clean and check the condition of shift and throttle cables. Clean and inspect steering system.
Trailers
Inspect trailer bunks, rollers, lights and wiring harness. Clean and inspect tongue jack. Check wheel bearings for moisture and repack if any beads of water exist in hub or if grease smells burnt, do a repack after inspecting bearings and races. Always replace seals after repacking wheel bearings. Inspect tires for wear and check the air level, filling if necessary.
Hull
This is a good time to pressure wash your hull and decks, checking all surfaces for cracks or damage. Clean all thru-hull hoses and strainers. Seacocks should be opened to drain all water and returned to the closed position. The hull should be checked for blisters. Should you find any blisters, you may want to open them so they’ll drain over the winter.
While this article does not address every possible scenario for every boat or consider every possible configuration, we’ve covered the most common tasks. Again, check your manuals carefully to see if your particular craft/engine combination has any quirks that require specific attention.
The ideal location for storing a boat is out of the water, in a covered, climate-controlled boat storage area. This option can be expensive, so if this isn’t possible you might want to consider shrink-wrapping your boat. While this too can be expensive, especially for large boats, it provides a weather protective shield that will help to avoid damage and harsh UV damage. The next best alternative is a quality boat cover.
Boats stored on land should be stored with the drain plug removed and the bow raised so boat can drain if necessary.
All of these items may sound like a lot of work, but once you’ve done it a few times it goes much faster, and the payoff is not paying for damage you could have prevented before heading for the duck blind or deer stand. After all, a cracked lower unit is the last thing you want to be thinking about as you squeeze the trigger.
- 2683 views