There's no disputing it — yarn egg flies are some of the most inexpensive and easiest fly fishing flies to ever come out of a vice. But, just because these flies require little effort to tie doesn't mean that they are not worth your time. Yarn eggs are an extremely productive fly for catching just about any type of trout or salmon that swims. Yarn egg patterns are mainly used during the steelhead runs of early spring when fish tend to pool up to spawn. Drifting egg flies to steelhead that have travelled up the river can provide for a very exciting day on the water.
 The strategy behind egg fishing is simple. Trout eat the eggs that get washed away from the beds as eggs contain high amounts of protein and carbohydrates. Fish spend a tremendous amount of energy getting to the beds and choosing a mate, so an easy high-energy meal like eggs rarely gets passed up. Additionally other trout such as browns and rainbows will stage just below the beds of the larger fish waiting for their eggs to come free during the spawning process.
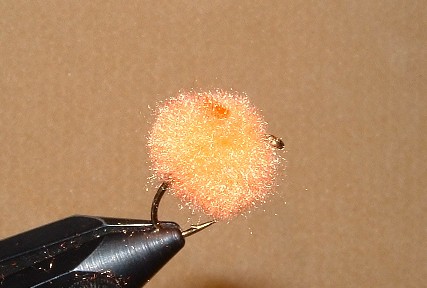
Since each different species of trout and salmon will have a different colored egg, it is a good idea to try and tie a few eggs in each of the respective colors. It is amazing how picky fish can become with eggs, selecting only certain types and sizes from all the numerous eggs drifting downstream. Egg flies should be tied in orange, pink, white and yellow with a dot of offsetting color to duplicate the oil droplet that occurs in natural eggs.
To fish yarn egg patterns, simply imitate natural eggs by dead drifting the fly on or near the very bottom. Natural eggs will never be floating in the middle of the current and fish will not rise to take yarn eggs floating by. Try drifting yarn eggs early this season and see how productive they can really be.
Fly Tying Yarn Egg Flies Materials List
| Hook | Mustad or Tiemco Egg Hook, Size 10 or 12 |
| Thread | Uni Thread, Orange, Size 8/0 |
| Body | Orange Glo Bug Egg Yarn |
| Dot | Pink Glo Bug Egg Yarn |
Step-by-Step Tying Instructions for Yarn Egg Flies
|
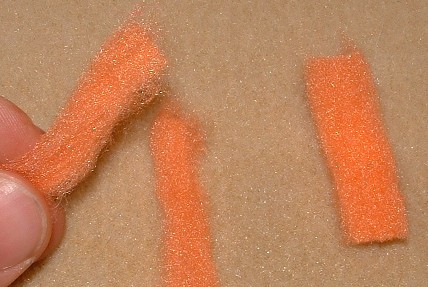
Step 1 Start this fly by cutting two one-inch sections of orange glow bug yarn. After you have the cut yarn sections, split each of these sections in half making 4-inch long sections of orange yarn. |
 |
|
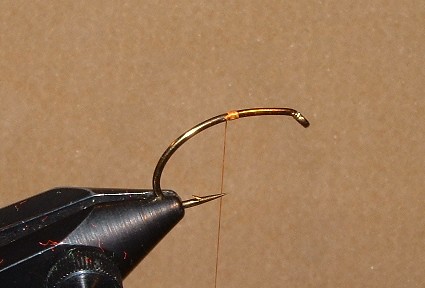
Step 2 Secure the hook in the vise tightly, and then attach the thread to the hook at the halfway mark on the shank |
 |
|
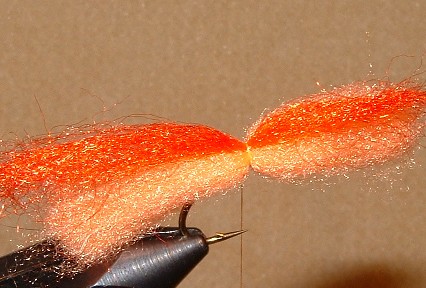
Step 3 Wrap down to the hook shank a single piece of orange yarn and place a thin strip of red yarn on top. |
 |
|
Step 4 Cinch down the two pieces of yarn on the top of the hook shank (use two light thread wraps around the yarn, and then slowly tighten the thread pressure to secure the yarn in place). Clip the excess tag ends so things are a bit easier to manage. |
 |
|
Step 5 Flip the hook in your vice (or, if you have a rotary vice, rotate the jaws) so that the bottom of the hook shank is facing up. |
 |
|
Step 6 Tie down a second piece of orange yarn onto the bottom of the hook shank like you did the first. |
 |
|
Step 7 Rotate the hook again so that the left side of the hook faces up, and then tie in another section of orange yarn. |
 |
|
Step 8 Rotate the hook one last time, bringing the right side to the top, and tie in the last section of orange yarn. |
 |
|
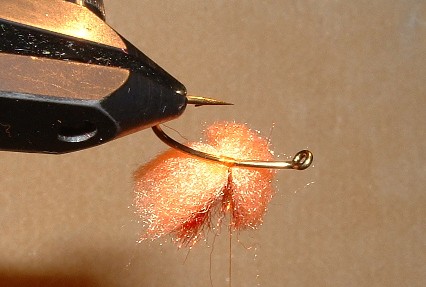
Step 9 After all the yarn is tied-down, turn your vice right side up and whip finish and cement the thread. |
 |
|
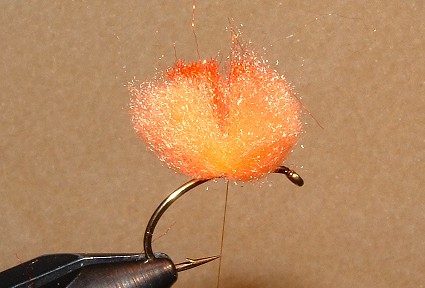
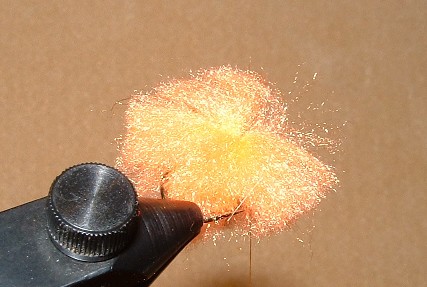
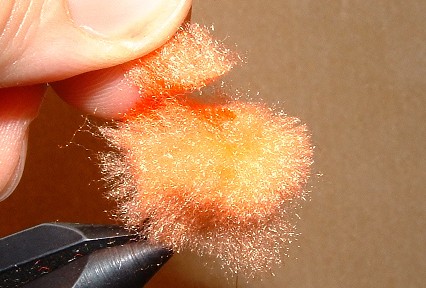
Step 10 Using your off hand, pull a small section of yarn straight up and trim it in a circular pattern with you scissors. |
 |
|
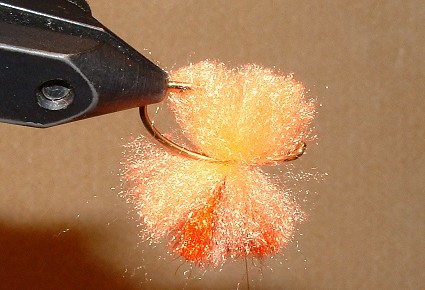
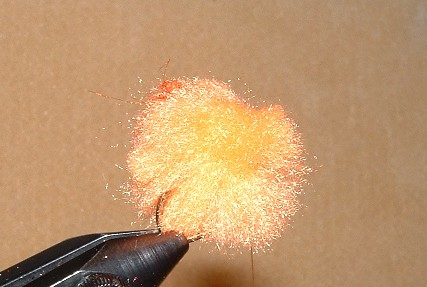
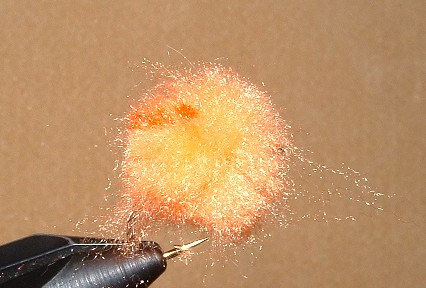
Step 11 Continue this cutting pattern until all the yarn has been cut to approximately the same length, and a nice circular shape is starting to appear. Tease out the yarn ball with your bodkin. |
 |
|
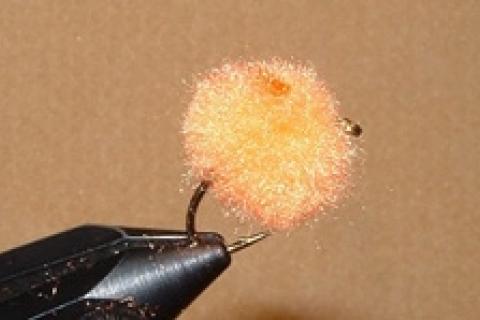
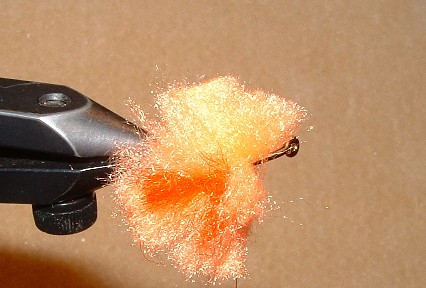
Step 12 Fine-tune your yarn ball into a nice round egg once more with a sharp pair of scissors. |
 |
- 16533 views